Create a simple Photolog using Blogger.com and Lightbox JS. A step by step guide for photo bloggers; to Integrate Lightbox with their existing Blogger publishing system.
![]() Blogger is a popular weblog publishing system, which supports custom designs and templates. Meanwhile Blogger is not much popular as other blog publishing system like WordPress, etc for its support to Plug-ins. In other hand Lightbox JS is a simple, unobtrusive script used to overlay images on the current page. It is lightweight and works with most of the browsers with Javascripts enabled.
Blogger is a popular weblog publishing system, which supports custom designs and templates. Meanwhile Blogger is not much popular as other blog publishing system like WordPress, etc for its support to Plug-ins. In other hand Lightbox JS is a simple, unobtrusive script used to overlay images on the current page. It is lightweight and works with most of the browsers with Javascripts enabled.
 Yesterday, I was trying to publish my own Photolog. I was looking for a good web serice so that it would ease my task. I am with Blogger for a quite time and still I have not moved my blog to WordPress, even I wish so. So I decided to go with Blogger again with the FTP publishing enabled. But blogger didn’t have any ready made plug-in for Lightbox so I had to hack the code little bit. Blogger with Ligthbox would give any blog a realistic Photolog look.
Step by Step Guide:-
- Download the Lightbox JS script from Here and copy the scripts to your web server most likely where your blog is been published.
- Login into Blogger system and go to Template –> Edit HTML
- Add the below line into the Meta section of HTML tag
<link rel="stylesheet" href="css/lightbox.css" type="text/css" media="screen">
- Add the following scripts tag in the header section of the HTML template
<script type="text/javascript" src="js/prototype.js"></script>
<script type="text/javascript" src="js/scriptaculous.js?load=effects"></script>
<script type="text/javascript" src="js/lightbox.js"></script>
- Check the CSS and make sure the referenced prev.gif and next.gif files are in the right location. Also, make sure the loading.gif and close.gif files as referenced near the top of the lightbox.js file are in the right location.
- Once you’re done Save the Template.
- With Blogger, we will not able to tweak their system directly, since it is not open source software. So we need to have little manual effort every time before you publish a photo log entry.
- After creating a blog entry in Blogger system, do the following steps before publishing.
- Go to Edit HTML option in the Post window as show in the figure

- Once you have uploaded the image you will see an entry similar shown in the figure below.
- Replace the selected code above with
rel=â€lightboxâ€as shown below
- You can also add title tag in tag to enable Caption in the LightBox displayed
- Now you’re all set and you can publish your Photolog.

If you like to have image sets for each post entry then you need to add rel="lightbox[group_name]" for all the images that you which to show in that particular group image set. It should be similar to the below image.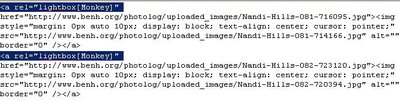
Now you have a wonderful Photolog to start with as I do; Visit my PhotoLog at The PhotoLog
A lightwindow 2 might help try it http://blog.clickmike.com/?p=65
Here is some more tips and tricks, check it out:
http://www.high-on-it.co.za/2011/02/adding-lightbox-to-blogger.html
Blogger has added Lightbox feature into its system. Refer to this link on how to enable it.
http://www.custombloggertemplate.com/2011/10/blogger-lightbox-is-back-this-time-with.html
Pingback: Wordpress vs. Blogger - Äpfel vs. Birnen?